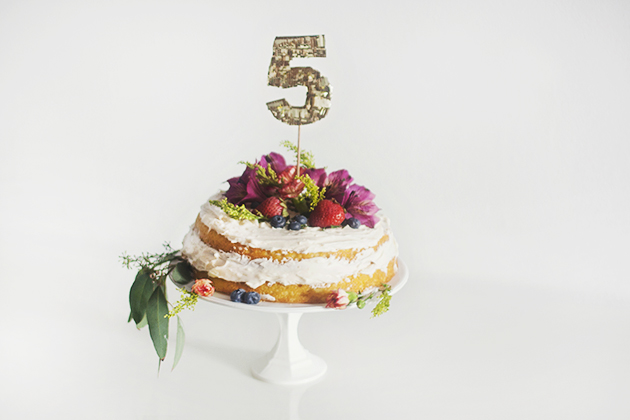
25 Sep DIY Gold Fringe Cake Topper!


Need a little extra sparkle for your next birthday celebration? Why not try this adorable gold, fringe cake topper! Easy and simple to make, and the perfect amount of glam to dress up even the plainest of cakes. Instructions below!
SUPPLIES NEEDED
1 – Cardboard or thick cardstock
2 – thin wooden dowel
3 – metallic gold tissue paper
4 – scissors/double sided tape
STEP 1
The first step was to print off a number and trace it onto my backing material. I used an old fedex mailer, but you could use thick card stock as well. Another option would be a thin wooden number if your local craft store has one. Print the number close to the size you want it to be. I printed mine 3″ x 5″. Once traced, cut it out of the material you have chosen with scissors.
STEP 2
Cut strips from the gold tissue paper close to .5″ in width and 4″ in length. You will need 15-20 strips depending on the size of your number. On each strip cut vertical lines about 1/8″ apart across the entire bottom. Be careful to not cut to close to the top so it does not rip. They should look fringy now!
STEP 3
With double sided tape, cover the entire front of your number. I did mine with horizontal strips going the same direction the fringe would be going. Wrap excess tape around edges to the back.
STEP 4
Starting at the bottom, add layers of fringe. With each layer you will cover up a portion of the previous layer until you get to the top. Trim off any excess on the edges. If there is a thin section (like the neck of the 5) cut the fringe down first to make it a little easier to apply.
STEP 5
Use double stick tape to adhere the dowel to the back of the number. You could use hot glue here too if you want!
So easy! Let us know what you think of this fun DIY and post any questions in the comments below.
Tomorrow is the last day of our birthday celebration week so be sure to check back for some fun goodies on the blog.
Click here to see our free printables and DIY projects or visit the NAPCP store at www.napcp.com/shop!


No Comments